Get ready to be captivated by the mesmerizing world of liquid nail art with water marbling. This innovative technique allows you to create stunning patterns and designs on your nails using water and nail polish. With its unique swirling effect and limitless possibilities, water marbling is sure to take your nail game to the next level. So, prepare to dive into this enchanting art form and discover the beauty that can be achieved with just a few drops of colorful polish.
What is Water Marbling?
Water marbling is a fascinating nail art technique that involves creating intricate designs on the surface of water and then transferring them onto the nails. It is a mesmerizing process that allows you to experiment with colors, patterns, and textures to create unique and stunning nail designs. The end result is a beautiful marbled effect that is sure to catch the eye.

Definition
Water marbling, also known as hydro dipping or water marbled manicure, is a nail art technique that involves floating and manipulating nail polish on the surface of water to create swirling patterns. The designs are then transferred onto the nails by dipping them into the water. This technique allows for endless possibilities in terms of colors, patterns, and combinations.
History
The origins of water marbling can be traced back to ancient China, where it was originally used as a form of decorative art on various objects like pottery and fabric. Over time, the technique made its way to other parts of the world and gained popularity as a nail art technique. Today, water marbling has become a popular trend in the beauty industry, with people all over the world embracing this mesmerizing art form.
Technique
The water marbling technique involves a few key steps that need to be followed in order to achieve the desired results. First, you need to gather the necessary supplies, including nail polish, water, a container, and tools for creating designs. Next, you need to prepare the water by adding a few drops of nail polish and using tools to create patterns. Once the design is created, you can then dip your nails into the water to transfer the design onto them. Finally, you need to finish off the process by protecting your nails and sealing the design with a top coat.

Popular Applications
Water marbling is not limited to nails alone. This mesmerizing technique can also be applied to other surfaces, such as phone cases, ceramics, and glassware. By using similar materials and following the same basic technique, you can create stunning designs on a variety of objects. This versatility allows you to explore your creativity and showcase your artistic skills in many different ways.
Getting Started with Water Marbling
If you’re new to water marbling, getting started may seem a bit overwhelming at first. However, with the right supplies and a little practice, you’ll be able to create beautiful designs in no time. Here’s a step-by-step guide to help you get started:
Necessary Supplies
To get started with water marbling, you’ll need a few basic supplies. These include nail polish in various colors, a shallow container filled with room temperature water, toothpicks or other tools for creating designs, tape or liquid latex for protecting your skin, a base coat and top coat, and nail polish remover for cleanup.

Preparation
Before you begin the water marbling process, it’s important to prepare your workspace and gather all the necessary supplies. Choose a well-lit area where you can work comfortably and have easy access to water. Lay out all your supplies within reach, making sure you have enough space to maneuver without knocking anything over.
Choosing Colors
One of the most exciting aspects of water marbling is the opportunity to experiment with different color combinations. Start by selecting a few nail polish colors that you’re drawn to. Try to choose colors that complement each other and create a cohesive look. You can also mix different finishes, such as cream, metallic, or shimmer, to add depth and dimension to your designs.
Preparing the Water
The quality of your water is crucial for achieving good results in water marbling. Make sure to use room temperature water, as cold water can cause the nail polish to clump and not spread properly. Fill a shallow container with water, leaving enough space for your nails to be dipped in. The water level should be deep enough to submerge your entire nail without touching the bottom of the container.
Protecting Your Skin
Water marbling can get a bit messy, especially if you’re new to the technique. To avoid getting nail polish on your skin, you can use tape or liquid latex to create a barrier around your nails. Simply apply tape or liquid latex around your cuticles and the skin around your nails, creating a protective barrier that can be easily peeled off once the process is complete.
Creating a Base Coat
Before you begin creating your design, it’s important to apply a base coat to your nails. This will help the design adhere better to your nails and make it easier to clean up any excess nail polish. Apply a thin layer of base coat to each nail and let it dry completely before moving on to the next step.
Adding the Design
Now comes the fun part – creating the design on the water’s surface. Working quickly, drop one color of nail polish onto the water and watch as it spreads out. Repeat this process with your other chosen colors, allowing them to spread and overlap on the water’s surface. Use a toothpick or other tool to create patterns and designs by gently swirling the polish on the water.
Once you’re satisfied with your design, carefully dip your prepared nail into the water, ensuring that the nail comes into contact with the design. Hold your nail in the water for a few seconds, allowing the design to transfer onto your nail. Slowly lift your nail out of the water, being careful not to smudge the design.

Mastering the Water Marbling Technique
Now that you have a basic understanding of the water marbling technique, it’s time to take your skills to the next level. By mastering certain aspects of the technique and exploring different tools and nail shapes, you can create even more intricate and unique designs. Here are some tips and tricks to help you become a water marbling master:
Understanding Viscosity
The viscosity of your nail polish plays a key role in how it spreads and interacts with the water. Nail polish that is too thick will not spread properly, while nail polish that is too thin may become opaque and muddy the design. Experiment with different brands and formulas to find the right consistency for water marbling. If your nail polish is too thick, you can thin it out by adding a few drops of nail polish thinner.
Creating Patterns
Once you’ve mastered the basics of water marbling, you can start experimenting with different patterns and designs. There are countless possibilities when it comes to creating patterns, so let your imagination run wild. You can create swirls, flowers, lines, or even intricate geometric shapes. Practice creating different patterns on a plain surface before attempting them on your nails.

Using Tools for Design
While toothpicks are commonly used for creating designs in water marbling, there are other tools that can help you achieve more intricate designs. Dotting tools, nail art brushes, or even the end of a paintbrush can be used to create different effects and patterns. Experiment with different tools to find the ones that offer the level of detail and precision you desire.
Using Different Nail Shapes
Water marbling can be done on nails of any shape and length. Whether you prefer a classic rounded shape or a trendy square shape, you can create beautiful designs that suit your personal style. Different nail shapes can also enhance the overall look of your water marbled design. Experiment with different shapes to find the one that best complements your chosen design.
Troubleshooting Common Issues
Water marbling, like any other art form, comes with its fair share of challenges. Here are some common issues you may encounter during the water marbling process and how to troubleshoot them:
Colors Not Spreading
If your nail polish colors are not spreading properly on the water’s surface, it may be due to the consistency of the nail polish. Make sure your nail polish is not too thick or too thin. If it is too thick, add a few drops of nail polish thinner to loosen it up. If it is too thin, allow it to thicken by leaving the bottle open for a few minutes. Additionally, make sure the water is at room temperature, as cold water can cause the nail polish to thicken and clump.
Designs Clumping Together
If your designs are clumping together or not spreading out evenly on the water, it may be due to overcrowding. Try dropping the nail polish onto the water’s surface from a higher distance to give it more time to spread out. You can also try using a toothpick or other tool to gently swirl the nail polish and create a more even distribution. Practice and experimentation will help you achieve the desired results.
Air Bubbles
Air bubbles can sometimes form on the surface of the water during the water marbling process, which can disrupt the design when transferring it to the nail. To prevent air bubbles, make sure to tap the surface of the water lightly with a toothpick or tool before dipping your nail. This will help release any trapped air bubbles. If air bubbles still appear, gently blow on the surface of the water to disperse them.
Designs Not Transferring to Nails
If your design isn’t transferring properly to your nails, it could be due to a few reasons. First, make sure you’re dipping your nail into the water at the correct angle and with enough pressure. If your nail is not fully submerged or if you lift it out of the water too quickly, the design may not transfer completely. Additionally, ensure that you’ve applied a base coat to your nails before starting the water marbling process. The base coat provides a smooth surface for the design to adhere to.

Advanced Water Marbling Techniques
Once you’ve mastered the basics of water marbling, you can take your skills to the next level by exploring advanced techniques. These techniques allow you to further enhance and customize your designs, creating truly unique and eye-catching nail art. Here are some advanced water marbling techniques to try:
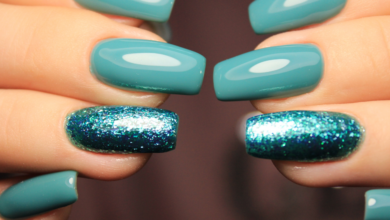
Incorporating Glitters and Shimmers
Adding glitters and shimmers to your water marbled designs can take them to a whole new level. You can sprinkle a bit of glitter onto the water’s surface before dipping your nails or use shimmery nail polishes to create a sparkling effect. This technique adds depth and dimension to your designs and makes them stand out even more.
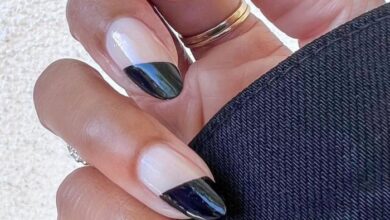
Using Negative Space
Negative space is a popular design technique that involves leaving certain areas of the nail bare or unpainted to create contrast and visual interest. In water marbling, you can achieve negative space by strategically placing your nails in the water to avoid certain parts of the design. This technique allows you to create minimalist and chic designs that showcase the natural nail.

Layering Designs
Creating layered designs in water marbling can add complexity and depth to your designs. Start by creating a base design on the water’s surface, then dip your nail and transfer the design onto it. Next, add another layer of design on top of the first one, using different colors or patterns. Dip your nail again to transfer the second layer onto the first, creating a multi-dimensional effect.
Combining Water Marbling with Other Nail Art Techniques
Water marbling can be combined with other nail art techniques to create even more intricate and unique designs. You can incorporate techniques such as stamping, hand-painted details, or even 3D elements like studs or rhinestones. By combining different techniques, you can create nail art that truly reflects your personal style and showcases your creativity.
Removing Water Marbled Designs
Removing water marbled designs can be a bit more challenging than removing regular nail polish. However, with the right techniques, you can safely and effectively remove the design without damaging your nails. Here are a few methods you can try:
Using Peel-Off Base Coat
Applying a peel-off base coat before starting the water marbling process can make removing the design much easier. Peel-off base coats create a protective barrier between the nail and the nail polish, allowing you to easily peel off the design without the need for nail polish remover. Simply apply a thin layer of peel-off base coat to your nails before water marbling and peel it off once you’re ready to remove the design.
Soaking in Warm Water
If you didn’t use a peel-off base coat, soaking your nails in warm water can help loosen the design and make it easier to remove. Fill a bowl with warm water and soak your nails for about 10-15 minutes. The warm water will help soften the nail polish, allowing you to gently scrape it off using a cuticle pusher or an orangewood stick. Be careful not to apply too much pressure, as this can damage your nails.
Using Acetone
If the design is stubborn and doesn’t come off easily with warm water, you can use acetone to remove it. Soak a cotton ball in acetone and place it on your nail, securing it with aluminum foil. Leave it on for a few minutes to allow the acetone to break down the nail polish. Afterward, gently scrape off the design using a cuticle pusher or an orangewood stick. Make sure to moisturize your nails and cuticles afterward, as acetone can be drying.
Protecting Your Nails
Regardless of the method you choose to remove your water marbled design, it’s important to take steps to protect your nails afterward. The water marbling process can be drying to the nails and cuticles, so make sure to moisturize them after removing the design. Apply a nourishing cuticle oil or a moisturizing hand cream to keep your nails and cuticles hydrated and healthy.

Best Practices and Tips for Water Marbling
To make the most out of your water marbling experience, here are some best practices and tips to keep in mind:
Working in a Well-Lit Area
Working in a well-lit area is essential for achieving precise and detailed designs. Natural daylight is the best option, as it provides the most accurate representation of colors. If natural light is not available, consider using a daylight lamp or a bright LED light to ensure you have adequate visibility.
Using Room Temperature Water
Using room temperature water is crucial for achieving the best results in water marbling. Cold water can cause the nail polish to clump and not spread properly, while hot water can evaporate the polish too quickly. Fill a shallow container with room temperature water and make sure it is not too cold or too hot.
Being Patient and Practicing
Water marbling is a technique that requires patience and practice. Don’t get discouraged if your first few attempts don’t turn out perfectly. As with any art form, it takes time and practice to develop your skills and create stunning designs. Keep experimenting, trying new color combinations, and refining your technique.
Experimenting with Different Color Combinations
Color combinations are endless in water marbling, so don’t be afraid to experiment and try new things. Mix and match different colors to create unique and eye-catching designs. Play with shades, finishes, and intensity to create different effects and moods.

Sealing and Protecting the Design
Once you’ve completed your water marbled design, make sure to seal and protect it with a top coat. A clear top coat will not only give your nails a glossy finish, but it will also help protect the design from chipping and fading. Apply a generous layer of top coat, making sure to seal the edges of your nails to prevent any lifting or peeling.
Inspiring Water Marbling Design Ideas
Water marbling opens up a world of possibilities when it comes to creating unique and stunning nail designs. Here are some design ideas to inspire your creativity:
Geometric Patterns
Geometric patterns are a popular choice for water marbled designs. Create intricate lines, triangles, squares, or even chevron patterns using contrasting colors. Experiment with different shapes and angles to create visually striking designs.
Floral and Nature-Inspired Designs
Embrace the beauty of nature by creating water marbled designs inspired by flowers, leaves, or landscapes. Use softer, pastel colors for a more delicate look or bold, vibrant colors for a bolder statement. Add fine details with a nail art brush to bring your floral designs to life.

Abstract and Swirl Designs
Abstract designs are perfect for those who want to unleash their creativity and experiment with different shapes and textures. Play with swirling patterns, asymmetrical designs, or random splatters to create abstract and eye-catching water marbled designs.
Ombre and Gradient Effects
Water marbling can be used to create stunning ombre and gradient effects on the nails. Gradually blend different shades of the same color or create smooth transitions between contrasting colors. The result is a soft and mesmerizing look that is sure to turn heads.
Holiday and Seasonal Themes
Water marbling allows you to create festive and seasonally-inspired nail designs. Incorporate holiday-specific colors and motifs, such as red and green for Christmas or pastel shades for Easter. You can also create designs inspired by different seasons, such as floral patterns for spring or icy blues and silver for winter.

Water Marbling Safety Precautions
Like any other beauty technique, it’s important to take proper safety precautions when practicing water marbling. Here are some safety tips to keep in mind:
Proper Ventilation
Make sure to work in a well-ventilated area when practicing water marbling. Nail polish fumes can be strong, so opening a window or using a fan can help reduce exposure to the chemicals. If you’re sensitive to fumes, consider using a face mask for additional protection.
Using Chemicals Responsibly
Nail polish and other nail art supplies contain chemicals that should be used responsibly. Follow the instructions on the product labels and avoid ingesting or inhaling the chemicals. Make sure to store your supplies in a cool, dry place away from direct sunlight.
Avoiding Skin and Eye Contact
While water marbling, it’s important to avoid direct contact with your skin and eyes. Nail polish can cause skin and eye irritation if it comes into contact with them. Use tape or liquid latex to create a barrier around your nails and avoid touching your eyes while working with nail polish.
Protecting Your Workspace
To prevent any damage or stains to your workspace, use a protective covering such as a plastic sheet or newspaper. This will catch any spills or drips and make cleanup easier. Keep your workspace organized and free from any clutter to minimize the risk of accidents or injuries.
Exploring Water Marbling Tutorials and Resources
If you’re looking to further enhance your water marbling skills, there are many tutorials and resources available to help you. Here are a few options to consider:
Online Video Tutorials
Online platforms such as YouTube and Instagram are treasure troves of water marbling tutorials. Search for water marbling tutorials by experienced nail artists, who will guide you through the process step by step. These tutorials are especially helpful for visual learners who prefer watching the techniques being demonstrated.
Books and Manuals
For those who prefer to learn from books and manuals, there are several publications available that provide detailed instructions and tips for water marbling. Look for books that specifically focus on water marbling or nail art techniques in general. These resources often include step-by-step instructions, troubleshooting tips, and design inspiration.
Social Media Communities
Social media platforms such as Facebook and Pinterest have dedicated communities and groups where nail art enthusiasts share their water marbling techniques and designs. Joining these communities will allow you to connect with like-minded individuals, ask questions, share your creations, and find inspiration for new designs.
In-Person Workshops and Classes
If you prefer hands-on learning, consider attending in-person workshops or classes. Many nail salons, beauty schools, and community centers offer water marbling workshops where you can learn the technique from an experienced instructor. These workshops often provide all the necessary supplies and offer personalized guidance to help you improve your skills.
Water marbling is a mesmerizing and creative nail art technique that allows you to unleash your artistic side. Whether you’re a beginner or a seasoned nail art enthusiast, there’s always something new to explore and learn in the world of water marbling. With a little practice, you’ll be creating stunning designs that will make your nails the center of attention. So, dive into the world of liquid nail art and let your imagination run wild!

30 Nail Designs for Short Nails(Opens in a new browser tab)
Nail The Basics: Starting Your Nail Care Journey With Stylish.ae(Opens in a new browser tab)
Beyond The Polish: Understanding Nail Health With Stylish.ae(Opens in a new browser tab)